Simple Ethereum Notary
Create a permanent, verifiable proof-of-existence for any file using a standard Ethereum transaction.
While Bitcoin provides a robust method for notarization, the Ethereum blockchain offers similar capabilities with its own unique ecosystem and tools. This guide provides a practical walkthrough of how to embed a document's "fingerprint" into an Ethereum transaction's input data field. This creates a permanent, publicly verifiable record that proves your document existed in its exact form at the time the transaction was mined.
This article is a practical, how-to guide for the concepts discussed in our insight, Chain of Custody for Your Ideas.
Methods for Ethereum Notarization
There are three primary ways to record data on Ethereum, each with different trade-offs in cost and complexity:
- Transaction Input Data (This Guide): Adding data to a standard transaction. It's simple, cheap, and the direct equivalent of Bitcoin's OP_RETURN.
- Smart Contract State: Calling a function to store the data permanently in a smart contract. This is more expensive but makes the data readable by other contracts.
- Smart Contract Events: Calling a function that emits an event. This is a highly efficient and common method for logging data for off-chain applications to find and verify.
For this guide, we will focus on the first method for its simplicity and directness, using the popular MetaMask wallet.
Step 1: Generate the Document Hash
First, you need the SHA-256 hash of the file you want to notarize. This process is identical to the one used in our Bitcoin guide. You can use the command line or our browser-based tool below.
Browser-Based Calculator
You can calculate the hash directly in your browser. Your file is not uploaded and never leaves your computer.
Step 2: Broadcast the Transaction in MetaMask
With the hash copied, you are ready to create and broadcast the transaction from your MetaMask Wallet.
- Open MetaMask and click Send. For notarization, you can send `0` ETH to your own address.
- In the "Hex data" field, paste your hash. Crucially, you must prefix the hash with `0x`. Note: this field might be hidden under an "Advanced" settings link in some versions.
-
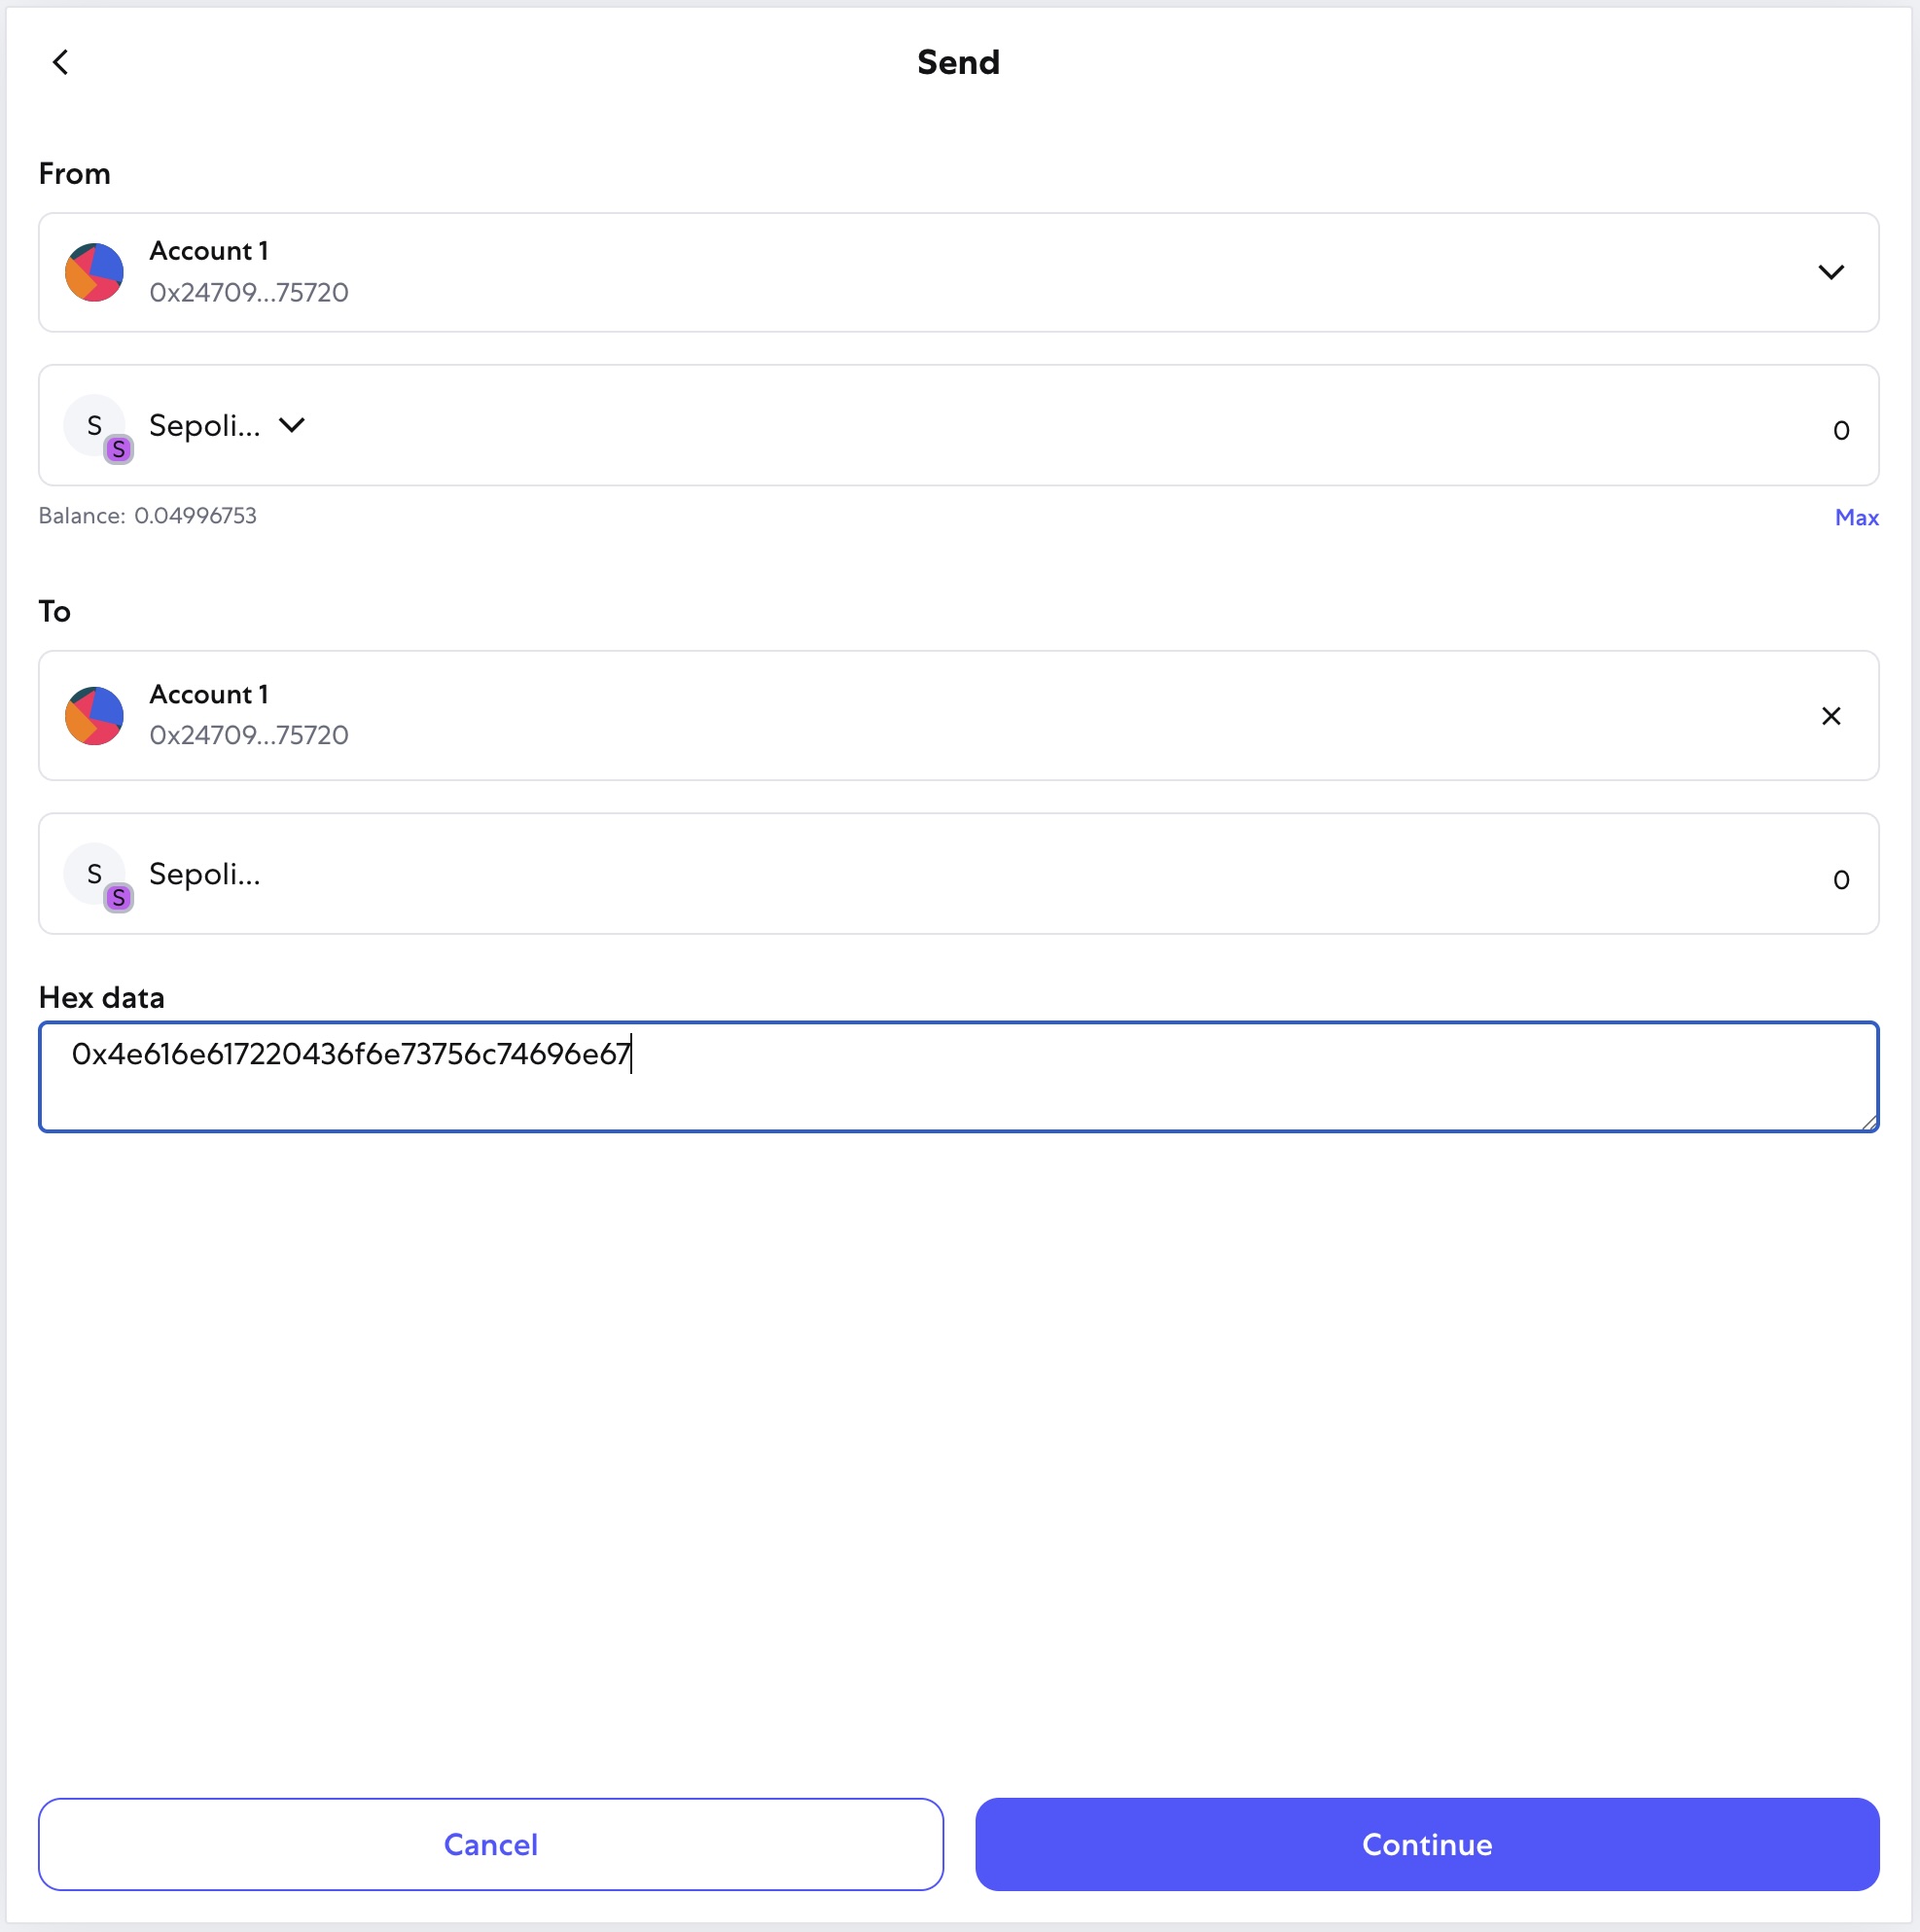
Pasting the 0x-prefixed hash into the "Hex data" field. - Click Continue and review the transaction details. You will see your data in the "Data" or "Hex" field. The network fee (gas) is the only cost.
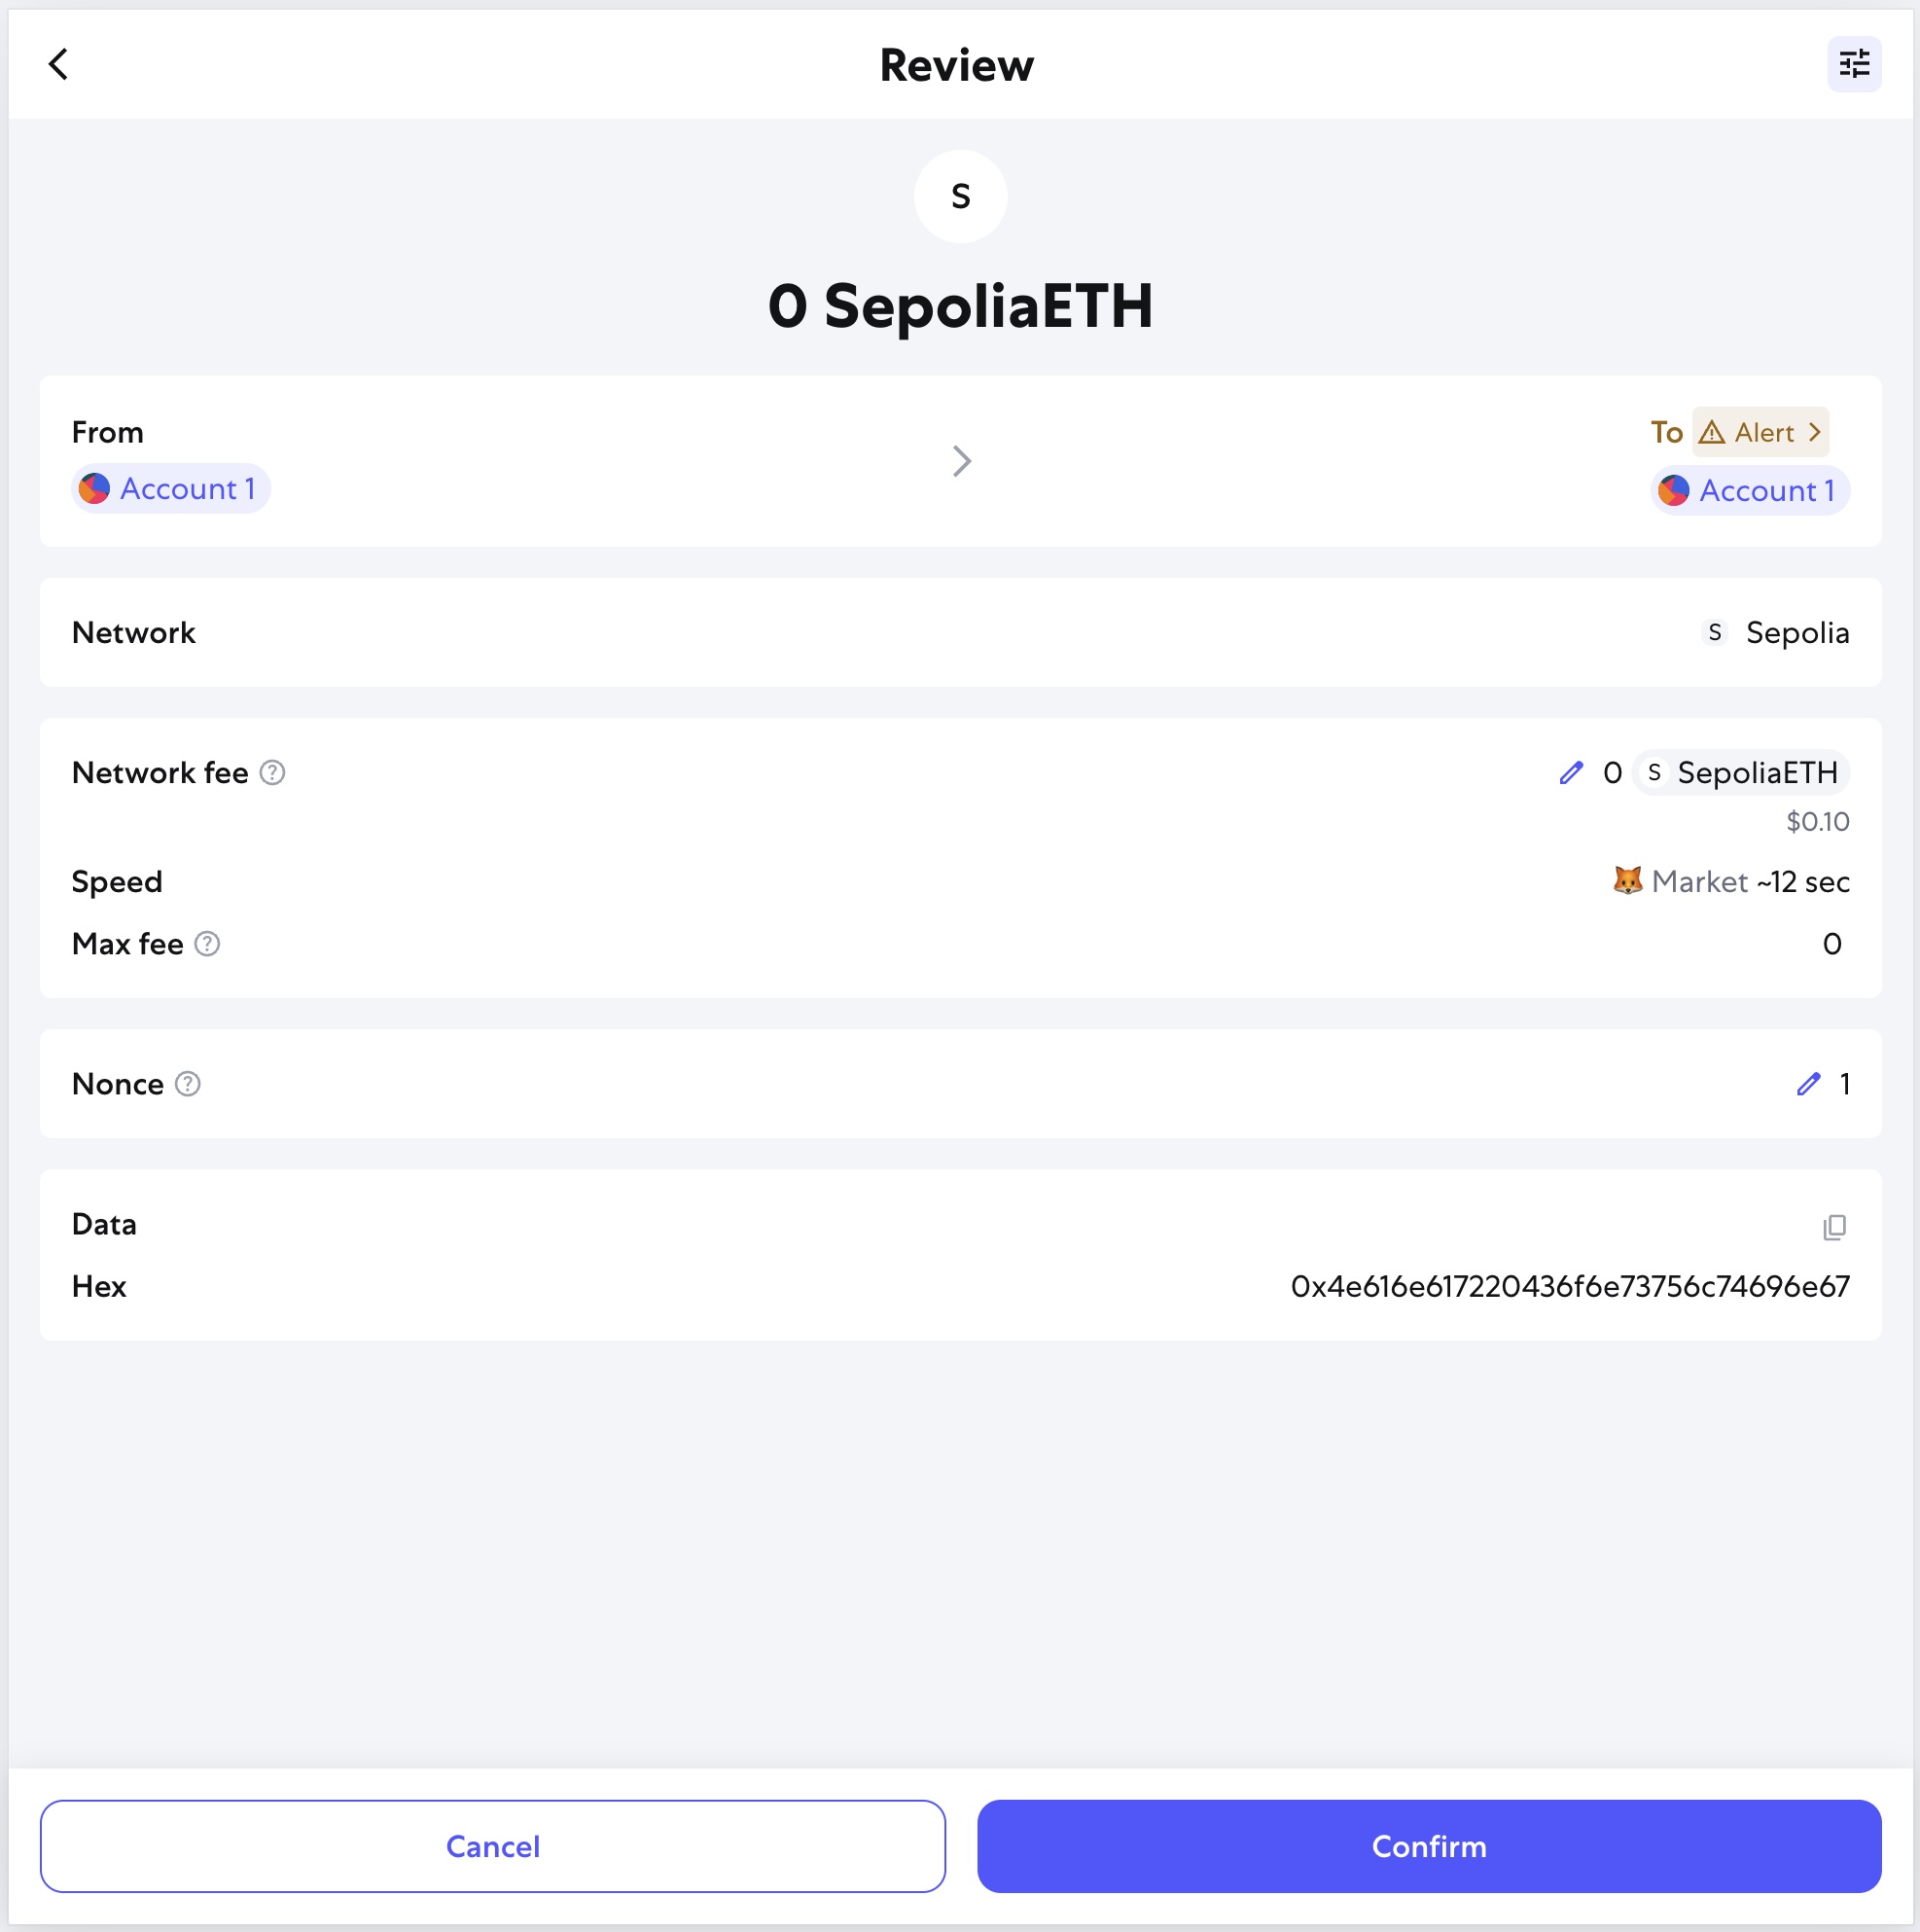
Final transaction details before confirming. - Click Confirm to broadcast the transaction. You will see it as "Confirmed" in your activity feed once it has been mined.
-
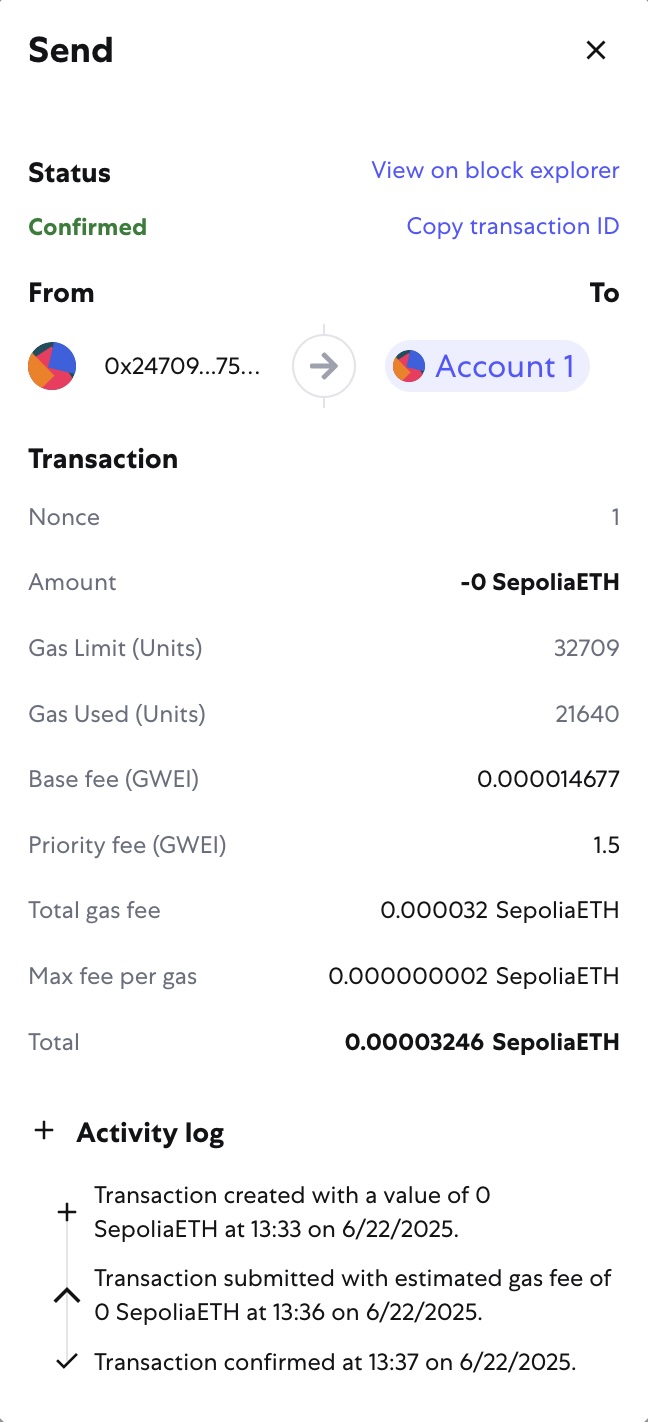
Transaction confirmed with timestamp in MetaMask.
Step 3: Verify the Transaction on a Block Explorer
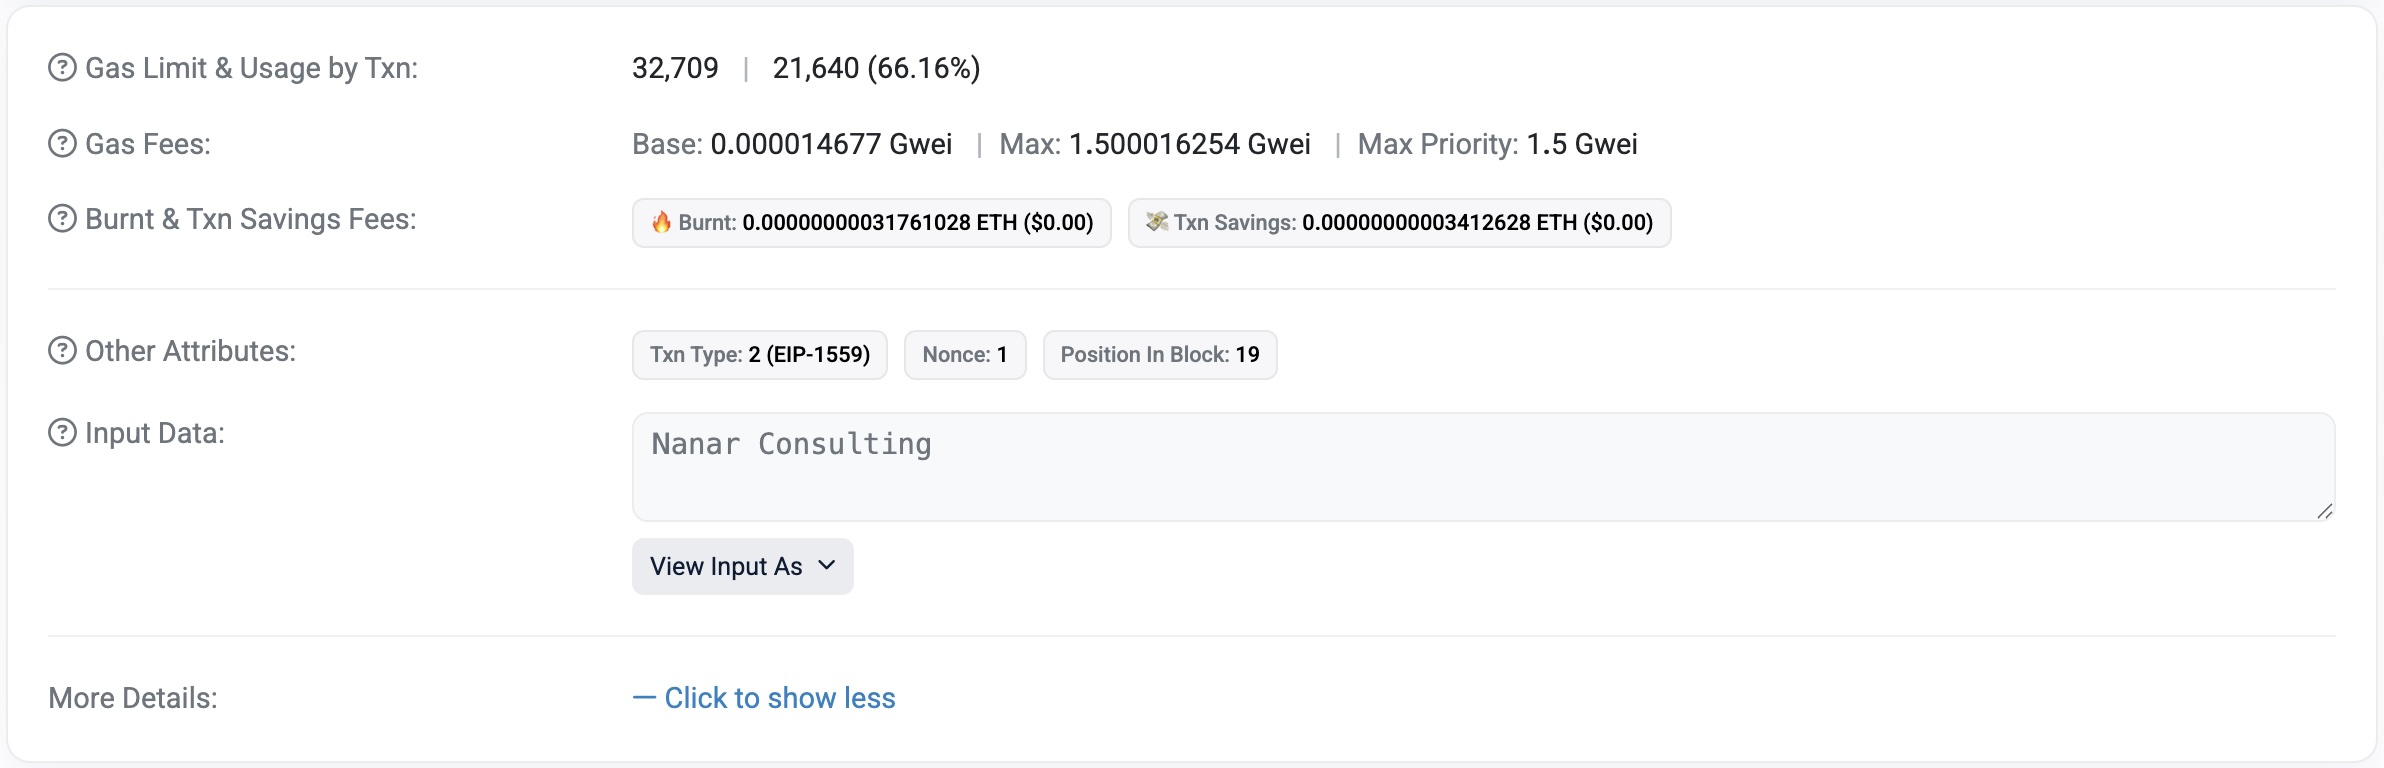
Once your transaction is confirmed, you can view it on any public Block Explorer like Etherscan to verify that your data was included. Your timestamp is permanently recorded as of the block's confirmation time.
You can see our example transaction here: sepolia.etherscan.io/tx/...
From Guide to Implementation
This guide provides the blueprint for individual use. However, building a secure, automated, and scalable system for an enterprise requires deep expertise in key management, fee optimization, and system architecture. Nanar Consulting specializes in developing these robust solutions. For organizations looking to protect high-value intellectual property or integrate blockchain notarization into business-critical workflows, we offer tailored software development and strategic advisory.
Looking for a More Advanced Method?
For a more robust solution that stores data in a queryable smart contract, see our developer-focused Ethereum Smart Contract Notary.